text and photos by Phil Bonzon, MMR
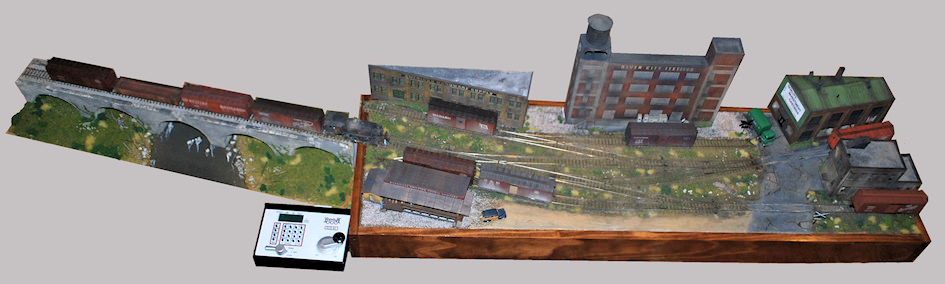
Okay, It happened to me again; I wanted something that did not exist commercially and having scratchbuilt many times before when the need arrived. I said why not? A stone arch viaduct for my B&O and one for the Gateway Division’s switching layout was what I wanted, only plaster castings was not something that I usually make. The last time, I was a Cub Scout and made a plaster casting of an Indian’s head, which I still have. At the 2010 MCoR Convention, Marty Vaughn, MMR (and MCoR AP Chairman) gave a clinic on castings and that was just what I needed to push me forward.
First I made decided to use plaster castings that would be 6″ long and join at the keystone that is at the center of the arch. This way, I could make the bridges to any length, as long as it was a multiple of 6″, and the parts would join at the narrowest part of the casting, meaning less things to match up.
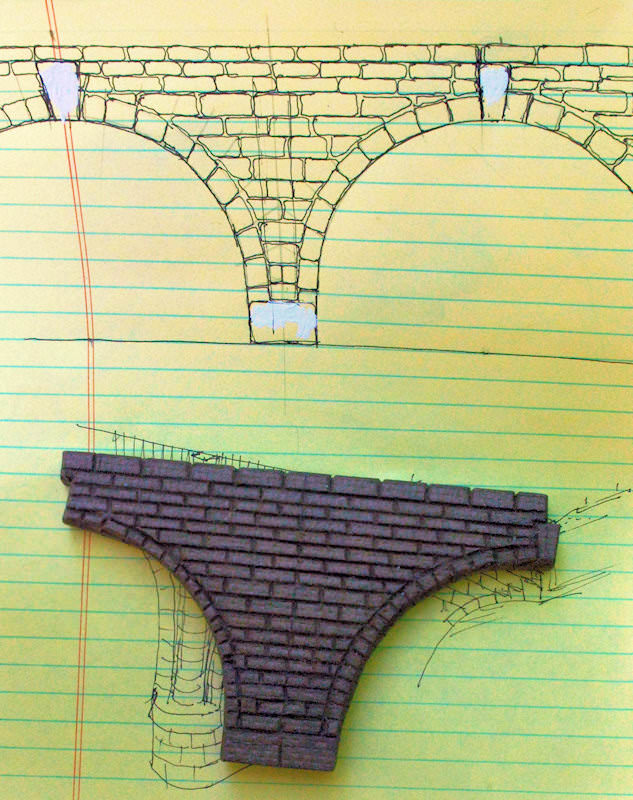
Next, I made a sketch of the part and decided to carve the master pattern out of homosote, because it carved easily, had desired thickness and some texture to the surface. After carving with an X-Acto #11 blade, I coated the pattern with shellac, let it dry, set the pattern on wax paper and sprayed it with PAM, cooking oil, to serve as a release agent.
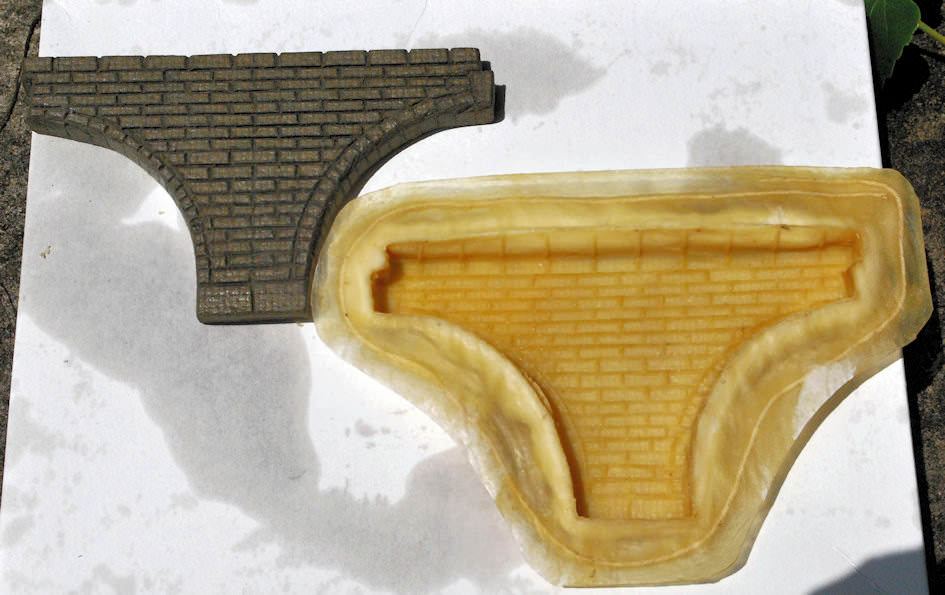
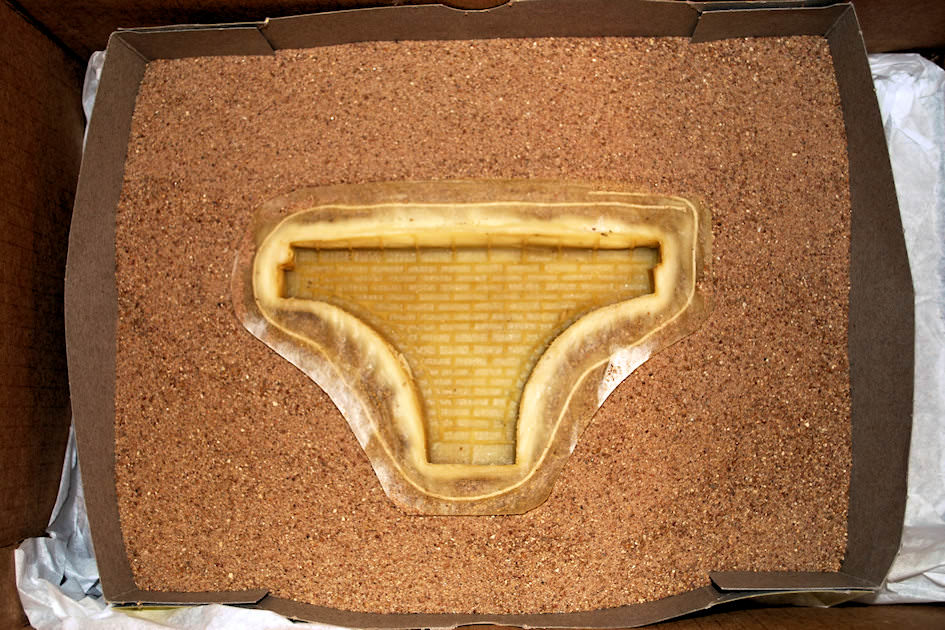
The latex rubber mold was made from “Castin’ Craft’s Mold Builder” that I got at Hobby Lobby. Using a cheap disposable brush, I applied about twenty thin coats to the pattern; letting each coat dry before applying the next. To speed up the drying process, between coats, I put the pattern/mold in the oven for 30 minutes at 160 degrees.
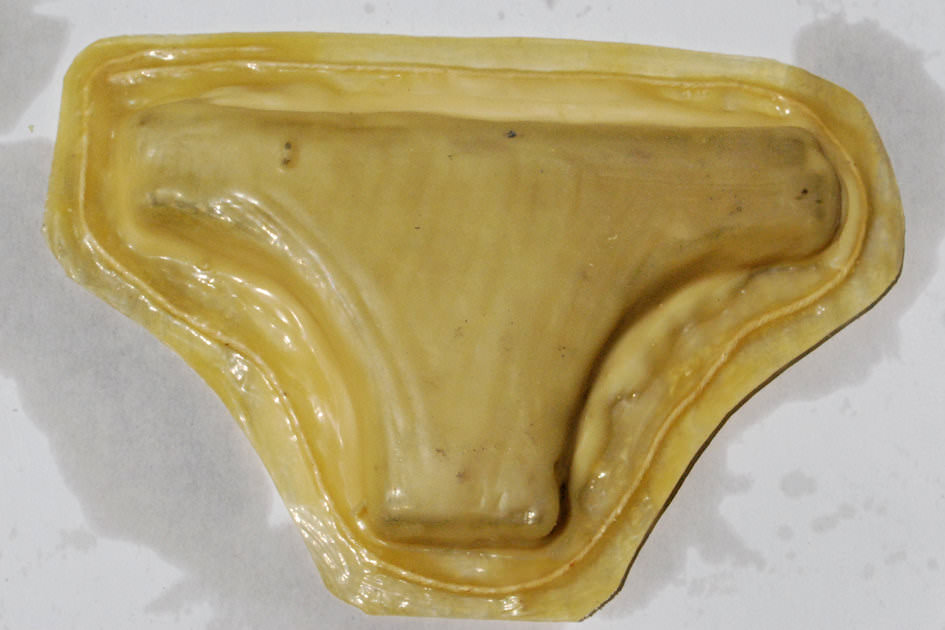
After the latex mold had cured, I placed in a box of river sand, to support the mold while pouring the plaster.
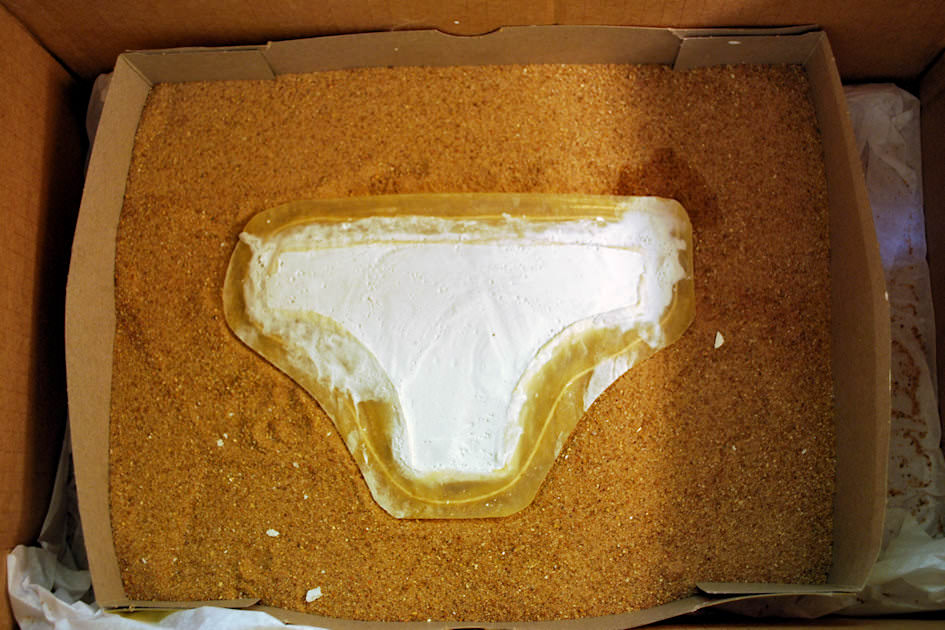
I wet the mold with water that had a little detergent in it, then mixed Patching Plaster to a consistency of a milk shake and carefully poured the plaster into the mold, so that it filled the mold to the top. After curing, I popped out the casting and repeated the process until all the castings needed were made.
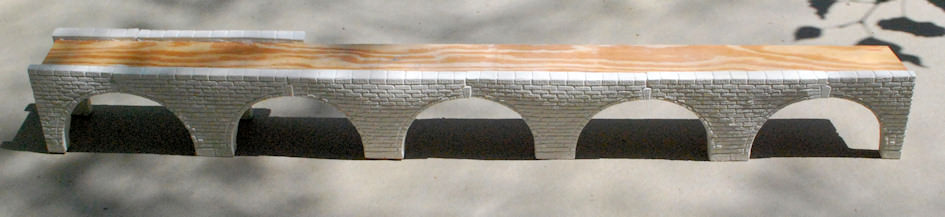
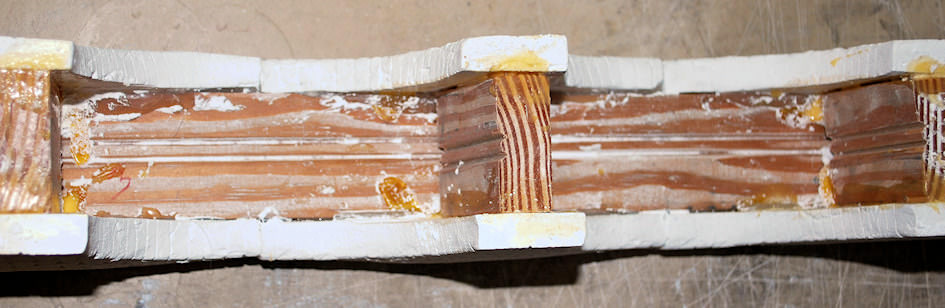
For the inner structure of the viaduct, I ripped a wood 1×4 to the desired width for the roadbed and the pier supports. After the castings were completely dry, I trimmed up the edges with a file and used a combination of hot glue and yellow construction glue to bond the castings and wood together. I found that if the castings are still moist the hot glue will not provide a temporary bond. The yellow glue provides the permanent bond.
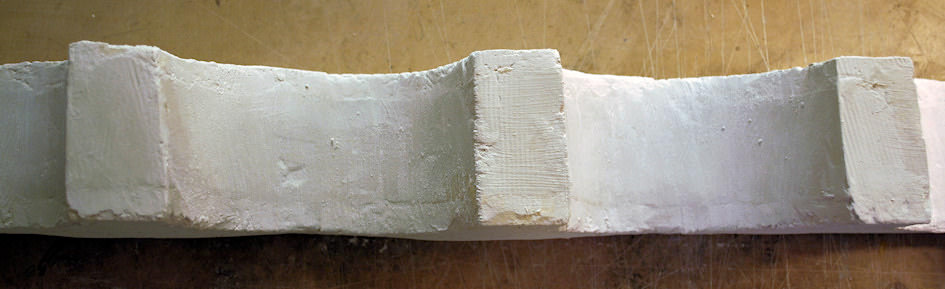
To fill in the underside of the arches, I mixed a stiff mixture (DQ Blizzard stiff) of patching plaster and applied it with a narrow putty knife. After drying, I used a wood rasp and course sandpaper to bring it to its final shape and finish. Also, I used these to clean up any misalignment at the keystone.
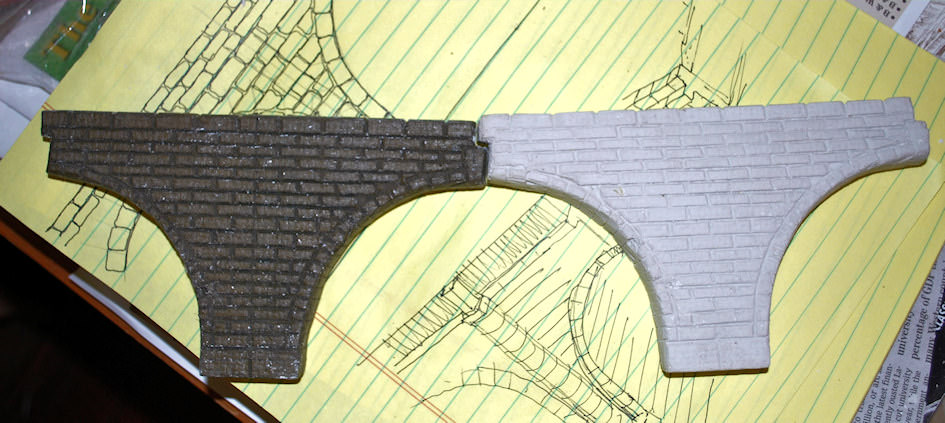
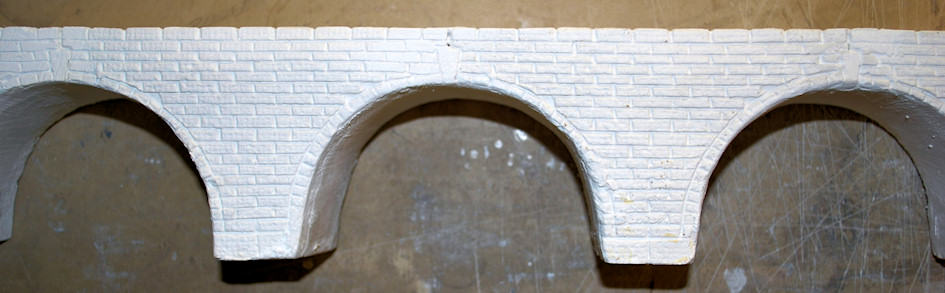
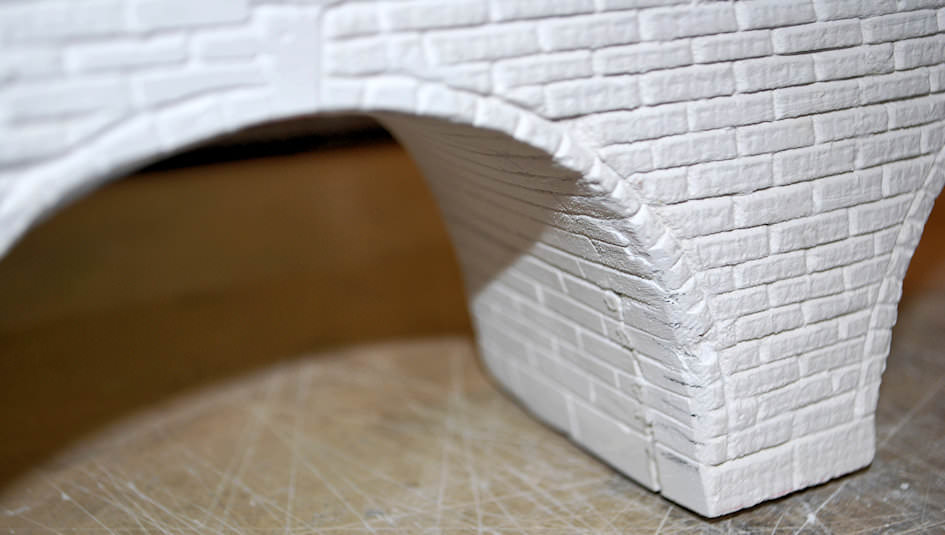
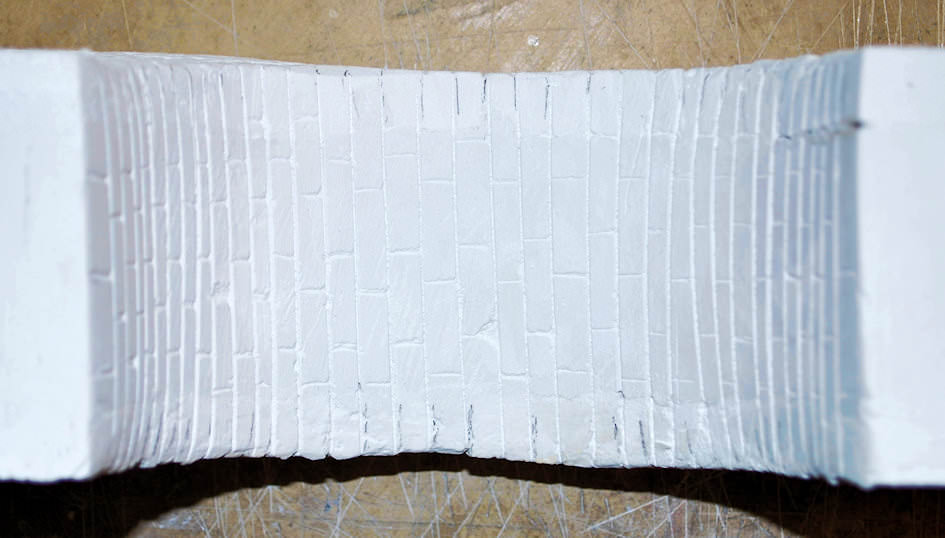
Using a razor saw, I connected the ‘stone joints’ from one side to the other and carved in the joints with a X-Acto #11 blade. Also, using a #11 blade, I recarved the joints at the keystones.
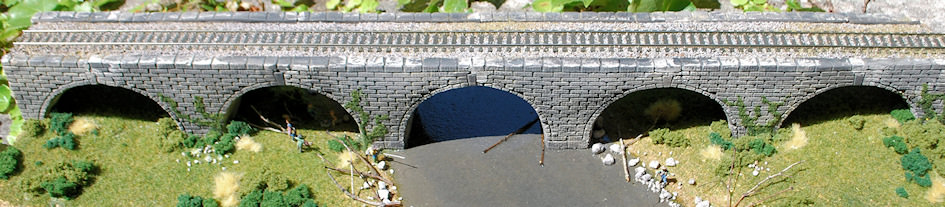
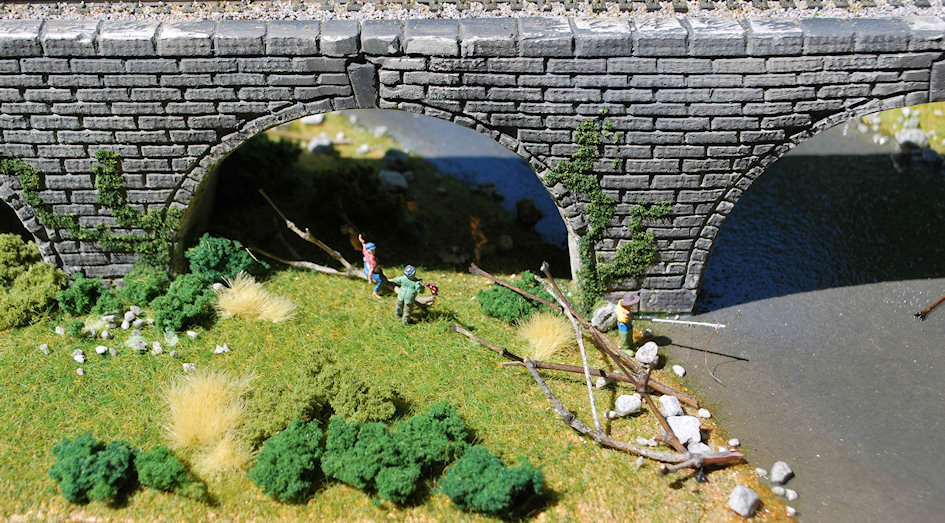
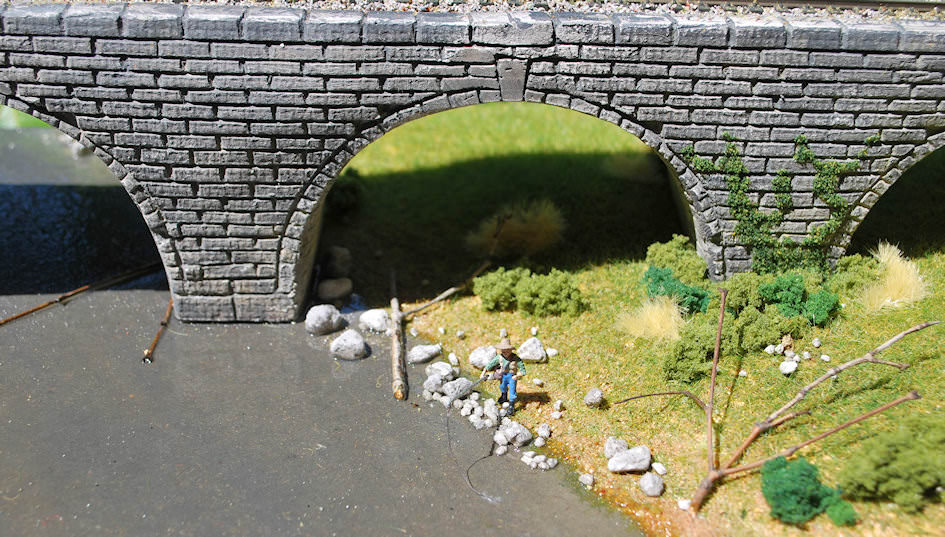
Using Woodland Scenics’ acrylic washes and their instructions for coloring rock castings; I colored the viaduct. The base was made from ¼” Masonite; landscaped with foam board insulation covered with plaster cloth; a mixture of patching plaster and sand; blended tuff, ground foliage; sand; twigs; rocks; “Realistic Water”; track/ballast and finally a hobo ‘jungle’ under an arch and two fishermen trying their luck.
Making your own castings is not a major task, as this was a different and fun project and certainly rewarding.


