Part I: The details
by Phil Sheahan photos by Gary Hoover
The place for a highly detailed structure is the foreground of your layout. There it can be best seen and appreciated. Keeping this in mind, you want to keep thinking “this is my masterpiece, the best I can do.” A highly detailed structure in the foreground will be where visitor’s eyes will focus.
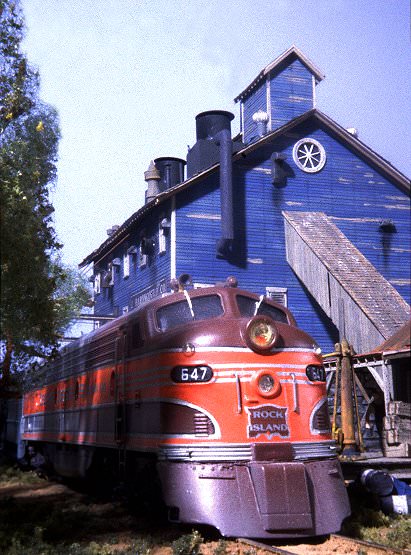
Wood structure on Phil’s HO scale module.
I highly recommend that you start by obtaining a piece of wood clapboard siding to practice the techniques and tips I’m sharing with you. When you can obtain the results that you want on the practice siding, that is the time to proceed with building that craftsman structure.
Hint: When selecting your first structure, remember that the more detail, the easier it is to hide minor flaws.
Collect the following tools and materials: Coffee can with lid, extra plastic coffee can lid, india ink, quart denatured alcohol, Elmers white or carpenters glue, paint (your choice of color), driftwood stain, pin vise, straight pin, paint brushes, two right angled blocks (angle plate and combination square head or whatever works for you), clamps (optional, plastic adjustable recommended), Xacto knife or single edge razor blade (sharp ones, but don’t slice your fingers!)
1. Paint and detail the walls while they are still flat. Brush paint all the walls, on both sides, with driftwood stain. Let sit overnight before continuing with the next step.
2. Stain, not paint, the outside of the walls the desired color. You accomplish this by using new, thoroughly shaken paint full strength for a wood building in good repair.
3. For an aged structure, you have two options. You may stain or paint the walls with full strength paint followed by a drybrushing with Floquil concrete. My drybrush technique is to dip the brush in a small amount of paint, and using a paper towel, take about 95% of the paint off the brush.
You may also use rubber cement applied with a toothpick to simulate peeling paint. The rubber cement is removed with an ordinary pencil eraser after the walls are painted. I apply the paint by dipping the brush into a jar of clean new Dio-sol or lacquer thinner, and then dipping about one-third of that brush in the paint. This procedure provides plenty of color variation and also shows off the effect of the driftwood stain.
Basically at this point you are going to scrub paint onto the surface. This is very hard on brushes, so a recommend using cheap brushes for this step. Acid brushes, although cheap, are not small enough to use for this step.
4. Using a straight edge and the straight pin installed in a pin vise, simulate nails. Start on each end and put in two nail holes per board. After the ends are complete, I usually run rows vertically off the window opening edges. Finally, use your scale to divide the remaining spaces equally and run more holes vertically. Periodically simulate board ends with your knife. Add extra nail holes around the board ends.
Gently, using your knife, score some of the vertical board ends deep enough to slide the knife under the raised clapboard edge to simulate a loose board.
Pattern to simulate board ends and nail holes.
This is very easy to overdo! I recommend no more than five or six loose boards per wall. If you break a section off, glue it back on, but as if it is hanging there by a single nail.
This whole process is somewhat tedious, but it adds a lot to the final appearance of the model. I don’t worry about “scale width” between the nail rows, but you may wish to consider and model that construction. Studs within many structures are usually 18″ or 24″ apart. This will usually require many more nail holes however.
5. Apply any “painted on” signs to the building. If using a paper original, turn it over and gently sand (using very fine sandpaper) the sign thinner, especially at all the edges. Take care during this process, as you want an intact sign! Sand until the sign is thin enough to easily and neatly conform to the clapboard walls. Coat the back of the sign with diluted Elmers glue (about 1 to 1 with water). Position the top of the sign where you want it and, with your fingernail, press down one row at a time until the entire sign conforms to the texture of the clapboards. Go back over the sign and simulate nail holes to complete the effect.
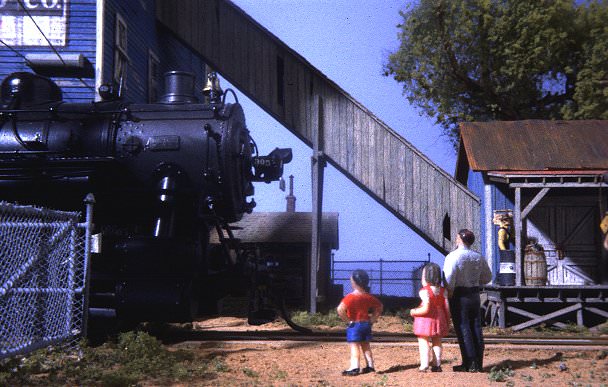
Steaming by a wood structure.
6. Make an india ink weathering stain with one tablespoon of india ink added to a quart of denatured alcohol. I keep this mixture in a coffee can. Stain the walls to age and weather them using a very cheap brush (like an acid brush). Don’t ruin a good brush applying this mixture. The stain will accent the nail holes and board edges.
7. I use the straight pin installed in a pin vise for most of my glue applications. It tends to stop you from using too much glue and white glue cleans easily from the metal pin. It also allows you to reach and glue places that are tough to get at any other way. Use a plastic coffee can lid as your glue palette. When white glue dries (by the next day), you can flex the plastic lid and the remaining glue will peel right out.
When you edge glue the walls, avoid getting glue on the front surfaces. Paints and stains to not cover the same on areas of wood which have been glued.


