text and photos by Richard Schumacher
Follow this step-by-step process for completing this inexpensive HO scale model building by Design Preservation Models (DPM).
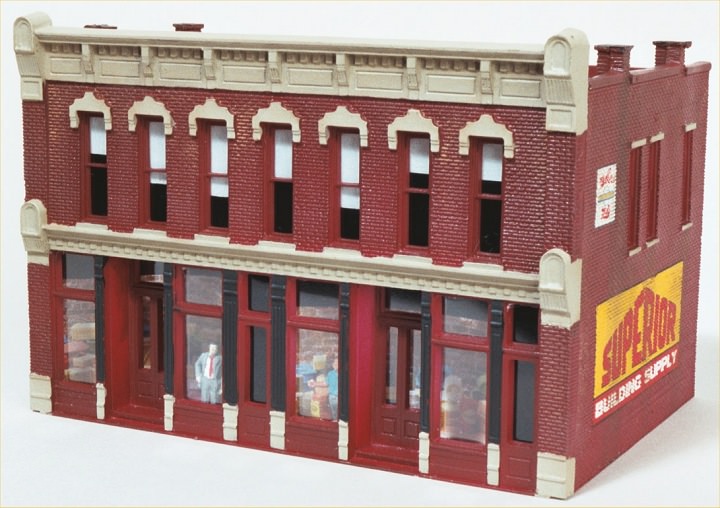
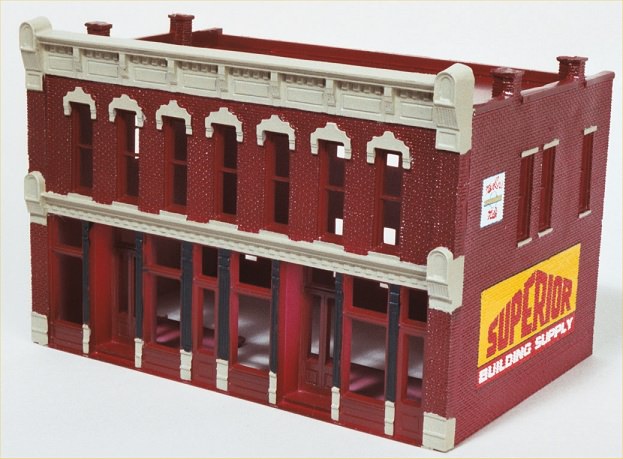
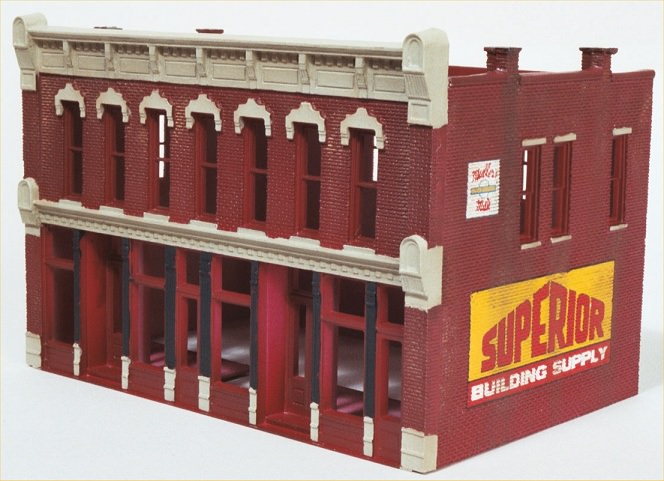
Completed DPM Front Street HO Scale Building.
See companion article on basics of assembling plastic structures. This will help with the truing of the walls require with this DPM kit. Remove pieces from sprues with rail nippers.
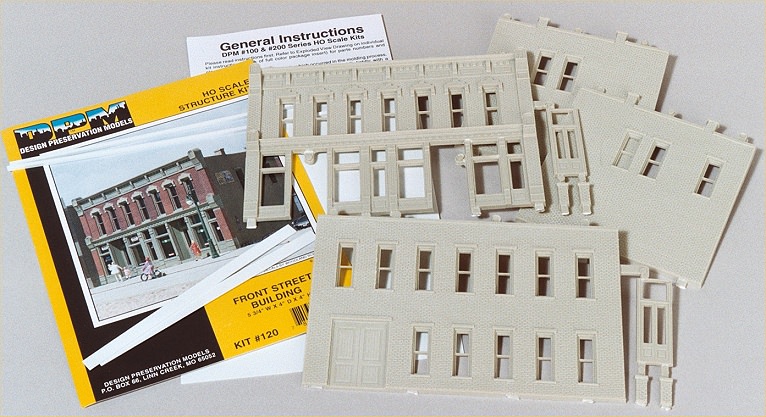
Parts provided with the DPM Front Street building kit.
Assemble the four wall sections with Plastruct plastic weld general plastic solvent cement making sure the building is square. Attach the chimney sections to the side walls. The main doors are recessed behind the front wall. Cut two strips of plastic (provided in the kit) and glue to each side of the door. After the glue sets, adjust the angle of these strips until it matches the door opening. Glue a piece of Walthers or Spectrum sidewalk behind each door opening so the door will match the height of the outside sidewalk later. Glue the door assembly in place. A section of the strip material is glued on the top of the door frame to complete the doorway.
Adding the front doorways to the HO scale DPM Front Street kit.
Cut the roof to size with scissors (test for size with a piece of notebook paper first, and then cut the roof plastic using the notebook paper as a template. Turn the building upside down, apply glue to the bottoms of the chimneys, and drop the roof in place. Add roof supports. File chimney tops flat. Add leftover strip of roof plastic at bottom front, aligned flush with the two corners of the buildings. This will complete the blending with the sidewalk.

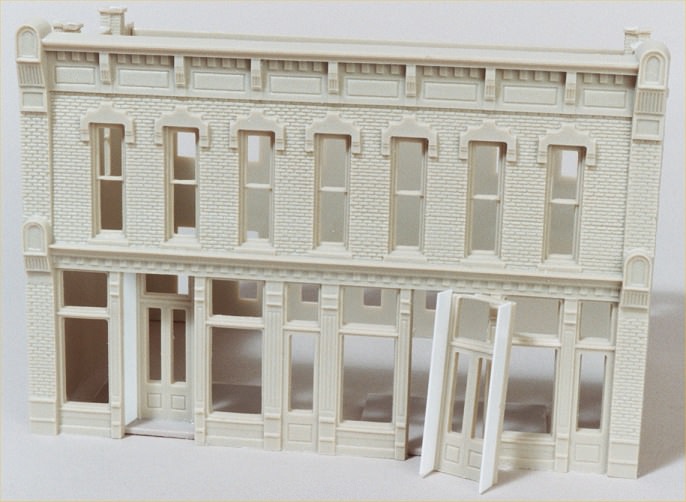
Assembled, but unpainted, DPM Front Street kit.
Wash the building with a couple drops of dishwashing detergent and water. Allow to completely dry. Paint the whole structure, including the top of the roof, with Badger Model-flex 16-87 “DM&IR Maroon.” This is easiest done with an airbrush. Make sure not to miss the doors, doorframes, and inside edge of the roof. You can also use an appropriate color hobby spray paint can.
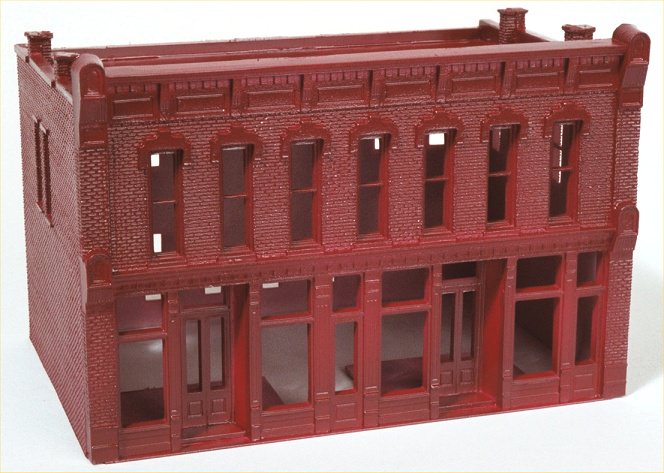
DPM Front Street HO scale model building with initial brick color applied.
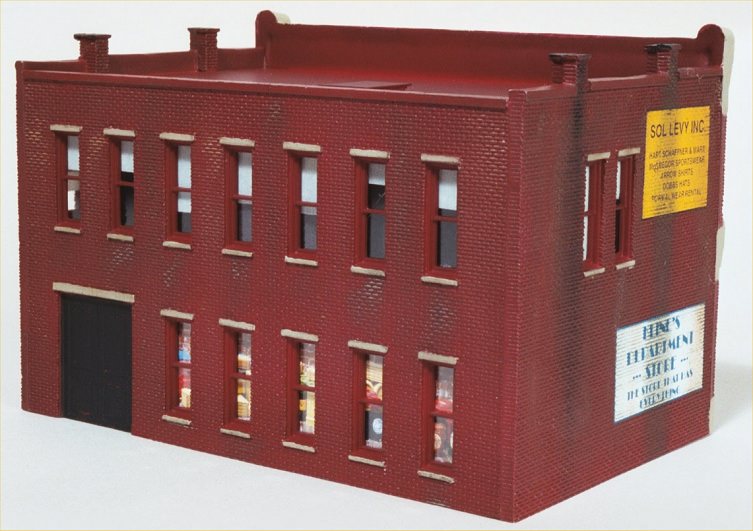
Hand paint the stone cornices, window arches, and window headers and sills with Badger Model-flex 16-103 “Armor Sand.” Paint the ironwork on front, the chimney tops, and the back door with 16-01 “Engine Black.” You could also paint all of the window frames on the second floor and back wall with the 16-01 “Engine Black,” although I didn’t in these photos. Add decal signs on the end walls, set with Walthers Solvaset 904-470. The signs on this building were leftover from a Bachmann Spectrum building. Microscale makes a number of building sign decal sets.
DPM Front Street model railroad structure with trim painted.
Blend the building colors using weathering chalks. Your weathering, like the water which carries it in real life, flows from top to bottom. My favorite weathering chalk is the SMC-901 set by Stoney Mountain. I lightly weathered this structure, emphasizing some streaks down from the chimneys, and rubbed medium gray chalk into the dental molding of the cornices to show off the detail. Make sure to weather over the decal signs as you do the walls. I left the doors and windows unweathered. Seal the chalk weathering with a light coat of Testor’s 1260 “Dullcote” clear flat lacquer overcoat. Your weathering will look fainter after the Dullcote spray.
Basic weathering applied to the DPM Front Street HO building.
Cut clear plastic window material to fit, making sure to test fit each piece. Start with the upper floor on the building front. The Windows were cemented to the back side of the walls with Woodland Scenics “Hob-e-Tac” adhesive. This adhesive holds the windows in place on contact and won’t craze them like plastic cements or superglue. Add strips of masking tape to the inside of the glass to represent shades. I printed a “warehouse interior” from the download section of our website on a color printer on heavy paper and cemented it behind the rear first floor windows.
Adding easy window shades and simple interior to HO scale building.
Cut to size and slide in a piece of black construction paper so you can’t see through the building. The black also intensifies the reflections from the glass. I painted the back side of the glass behind the two apartment stairwell doors on the front of the building with Badger Model-flex 16-01 “Engine Black.”
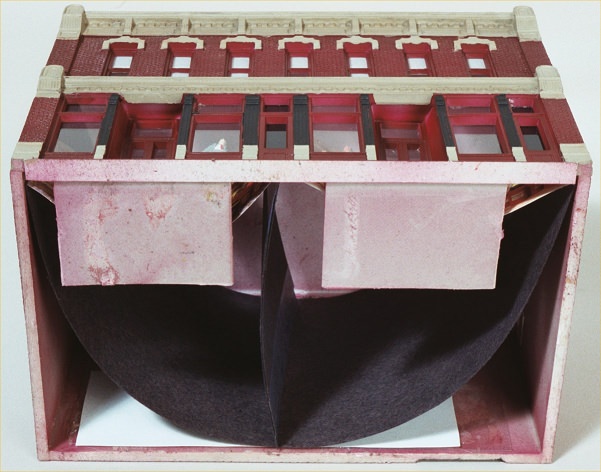
Black paper divider and interior prints added to the DPM building.
I glued two figures in the front windows looking out. On the Missouri Historical Society layout (where this building is now displayed), there is a road construction scene in front of this structure – people would be looking out the windows watching. The front windows are large enough they need some sort of interior. The two figures, and curved warehouse interior color prints (downloaded from our website), quickly provides a reasonable looking interior.
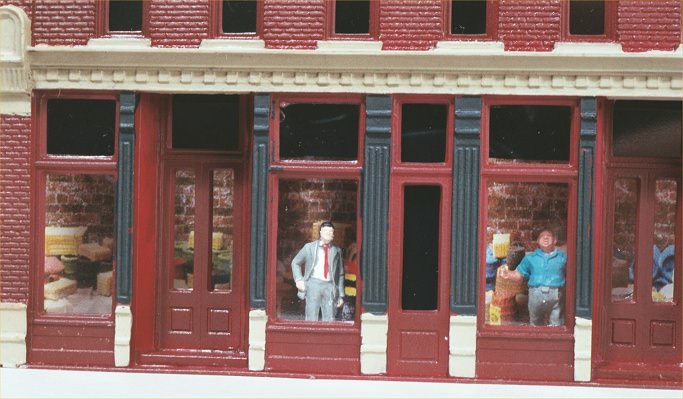
Close-up view of the model building with figures inside.
Whether close-up, or at a distance, the basic interior behind the front windows makes the structure look “complete.” N scale light brown ballast, to simulate a gravel roof, was glued to the roof with Elmer’s white glue. Apply the white glue to the roof, spread evenly so it covers the entire rooftop, and sprinkle with the ballast.
Completed DPM Front Street HO Scale Building.
Install on your layout and enjoy.
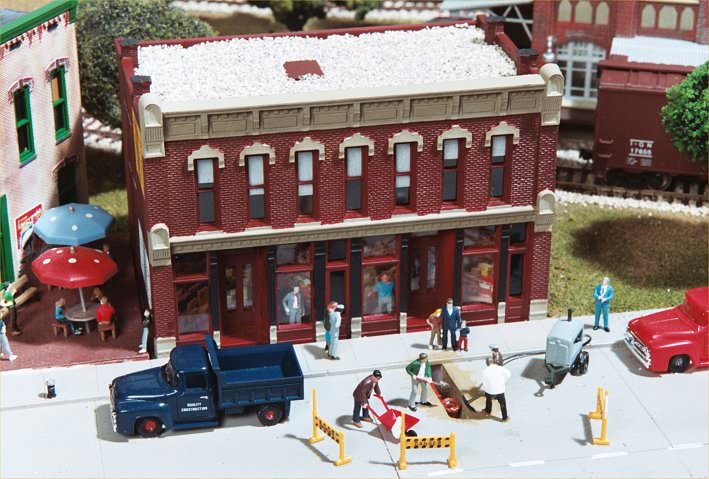
The building and “construction scene” on the MHS model railroad.


