text and photos by Richard Schumacher
You can follow the step-by-step process for completing this HO scale model building.
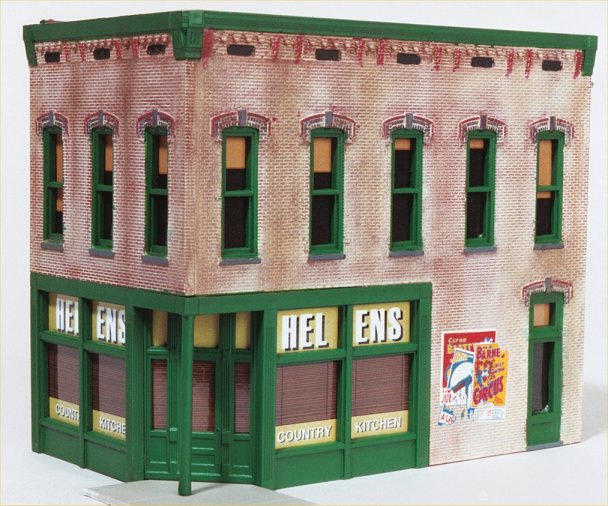
Completed model of the Rix-Smalltown USA “Helen’s Country Kitchen.”
See companion article on basics of assembling plastic structures.
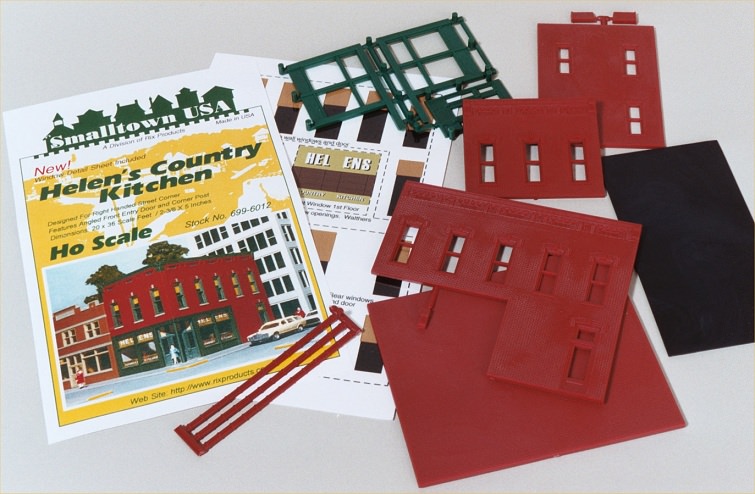
Parts for “Helen’s Country Kitchen.”
Remove pieces from sprues and pins from backs of walls with rail nippers. Make sure to leave the two pins at the top of the front wall in this kit (see below).
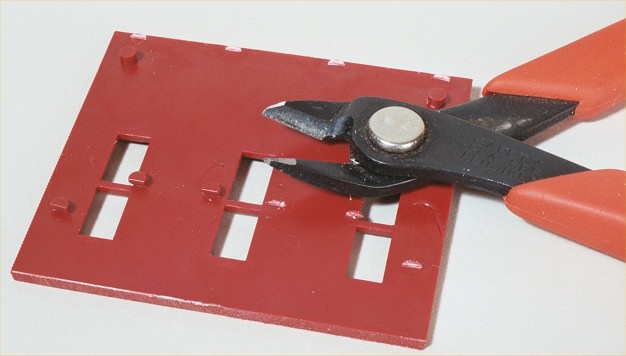
Remove pieces from sprues and pins from backs of walls with rail nippers.
Assemble the four wall sections with Plastruct plastic weld general plastic solvent cement. Adding roof helps to make sure the walls are square. The two chimney sections are glued together and then to the roof. Add tile cap to top of side wall without windows.
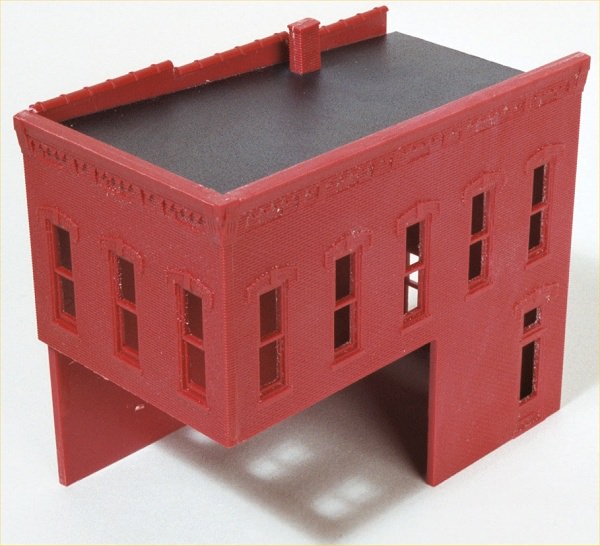
Assemble the four wall sections with plastic solvent cement.
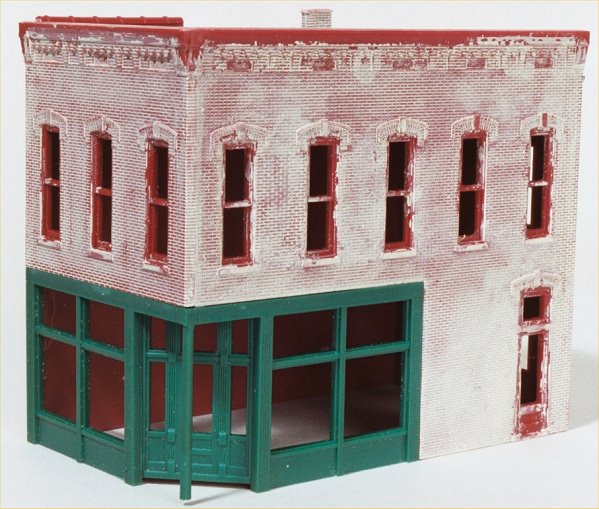
I wanted a heavily weathered look for the brickwork on this structure. Wash the building with a couple drops of dishwashing detergent and water. Allow to dry. I made a 40-60 mixture of Badger Model-flex 16-30 “Sand” and water. This was applied to one side of the building at a time with a Q-tip and allowed to dry (takes only a few minutes). The mixture settles into the joints of the brickwork. Make sure to do the chimney to match. Attach the front windows and door. Note that I raised the door and slightly trimmed the length of the corner post to allow a section of Walthers or Spectrum sidewalk to fit beneath.
Wash the building with a diluted mortar color paint. The mixture settles into the joints of the brickwork.
Paint the windows, doors and cornice with Badger Model-flex 16-85 “Reading Green.” Paint the window sills and keystones, and Streak the roof (downhill), with 16-05 “Weathered Black.” Paint the the vents (under the cornice) and the top of the chimney with 16-01 “Engine Black.” You can add some light black streaks to the roof as well. Highlight specific bricks, such as those in the window arches, with the fine tip of a Berol Prismacolor art marker. I prefer PM-150 “Mahogany Red” and PM-152 “Henna” for this. Add decal signs, set with Walthers Solvaset 904-470. The signs on this building were leftover from a Bachmann Spectrum building. Microscale makes a number of building sign decal sets.
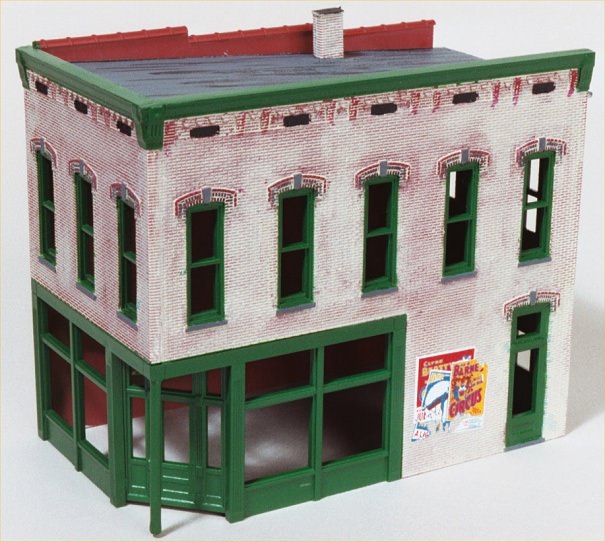
Paint the windows, doors and cornice. Add decals.
Blend the building colors using weathering chalks. Your weathering, like the water which carries it in real life, flows from top to bottom. My favorite weathering chalk is the SMC-901 set by Stoney Mountain. One kit will do your entire railroad. Make sure to weather the roof, roof tile, walls, and over the decal signs. I left the doors and windows unweathered to represent a new paint job. Seal the chalk weathering with a light coat of Testor’s 1260 “Dullcote” clear flat lacquer overcoat.
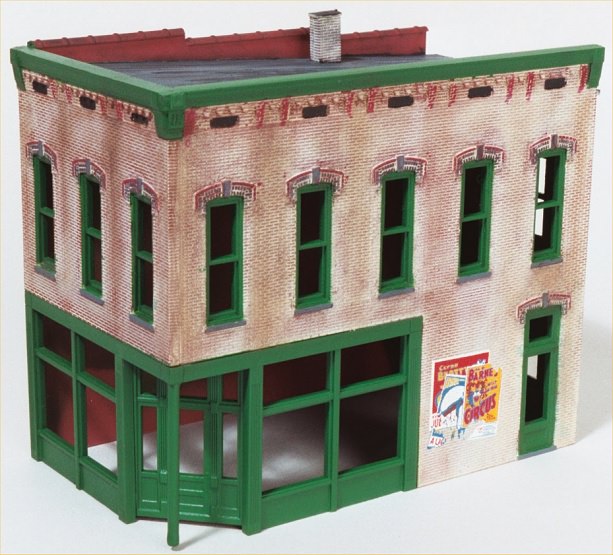
Blend the building colors using weathering chalks. Seal with a light coat of Testor’s “Dullcote” clear flat lacquer.
Add the “windows” provided with the kit, which is a pre-printed color sheet covered in a glossy clear laminate to represent the glass of the windows. These are cut out on the dotted lines and cemented to the back side of the walls with Woodland Scenics “Hob-e-Tac” adhesive. This adhesive holds the windows in place on contact. Test fit the placement before applying the cement.
Completed model of the Rix-Smalltown USA “Helen’s Country Kitchen.”


