by Richard Schumacher and Venita Lake
photos by Richard Schumacher
Originally presented as a clinic at the Long Beach NMRA National Convention
Plastic structures offer a wide variety of building styles at very affordable prices, and they continue to improve in quality and detail.
Instructions for simple plastic structures by manufacturers such as Design Preservation Models (DPM), Smalltown USA, Atlas, and International Hobby Corporation (IHC) range from overly simple to very helpful. Those in recently developed kits seem to be more comprehensive. Following the basic directions (trim the pieces, glue them together, paint if you wish, and add the windows) will probably produce a pretty good structure. A better building can be made, however, by planning ahead, using the right tools and supplies, and working carefully.
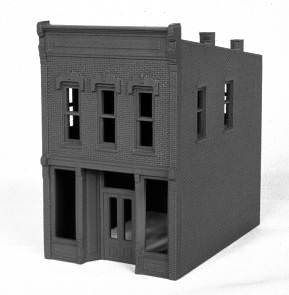
The building assembly described here is for a DPM (Design Preservation Models) “Kelly’s Saloon,” kit #101. This is an inexpensive but very nice kit, highly recommended as a beginner’s structure project.
We have also added online construction articles with lots of color photos for a different DPM structure and a RIX Smalltown USA structure which use the same techniques explained in this article.
To begin building any structure, first review the directions, any diagrams, and the parts of the kit. Visualize how the pieces will go together and how you wish to paint them. Consider ways you might individualize your building.
Useful tools include an x-acto knife, scissors, tweezers, files, side-cutting pliers, and 100-grit sandpaper.
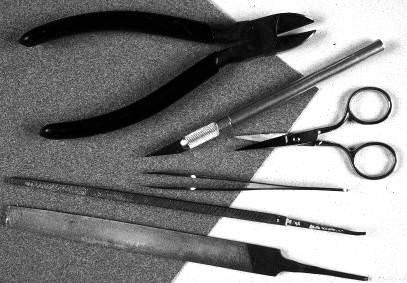
Tools for model railroad structure construction.
All major pieces must be prepared before gluing and painting. DPM and Smalltown USA structures usually have four side walls, roof materials (a sheet of plastic for the roof and small plastic brace strips), and small details such as chimney pieces.
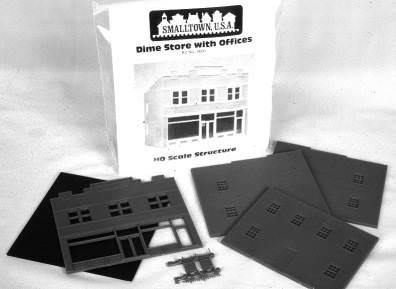
Major parts of a model railroad structure kit.
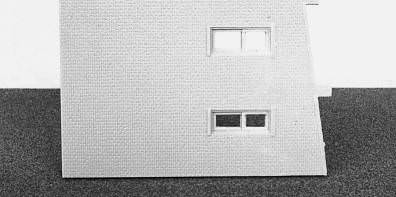
Determine how sides will be glued together. Most structures butt an edge of one piece to the back of an adjoining wall. Since edges are usually slightly beveled to facilitate removal from the manufacturing molds, they must be sanded square. This is an important step for kits with this type of corner construction as it prevents assembly problems and a very visible and unsightly gap:

Side gap on a DPM model structure kit.
If your kit uses this type of corner assembly, smoothly sand off the bevel, test fitting to ensure the edge is square. Many kits are designed to fit together without the need for this sanding, so you need to carefully look at the edge and do the “gap test” (above) to determine if sanding is required. For those kits that will need the sanding (such as DPM and Smalltown USA), note that one edge usually is plain (for glue) and the other has molded-in detail. Don’t sand off the detailed edge!
Sanding the edge on a DPM model structure kit.
The back sides of the walls should also be sanded on a flat surface to clean up window openings and assure a good fit, without gaps at the corners or window panes. Casting tabs at the wall bottoms, and small pieces molded together on sprues, may be cut with small nippers or an x-acto knife. The sandpaper technique is used to smooth the wall bottoms. Very small pieces may be left on the sprues until they are painted and touched up. Where a surface will remain unpainted, small parts can be placed on masking tape, sticky side up, for painting and security until they are needed.
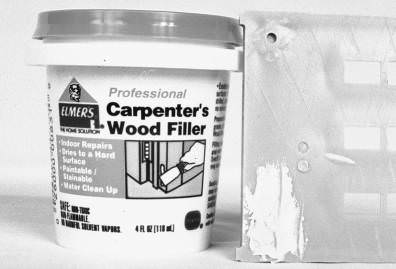
Wood filler eliminates casting holes on DPM model structures.
Some pieces may have dimples or holes on the back as a result of the molding process. These should be filled with carpenter’s wood filler or Squadron green putty if they are visible above the roof line or if the building will be lighted. When the filler has completely dried, it is sanded smooth. More than one application may be necessary for larger holes as these fillers can shrink as they dry.
When all pieces fit accurately, they are ready to be glued. Liquid styrene glue such as Testor’s, Tenax or Plastruct bonds the plastic by melting the two pieces together. Don’t use tube-type plastic glues. The liquid glue is applied with a small brush or a needle applicator. Coat the two surfaces (edges) to be glued, and while still wet firmly squeeze together. This technique ensures a solid bond. After it starts to set, go back and apply additional liquid glue on the inside of the joint, which will wick into the joint. Do this sparingly to avoid glue running to the outside and etching the brickwork details.
Assemble the four walls first. You usually start with the front wall and one side. Then attach the other side wall, and finally the back wall. On many of these kits the back wall installs between the two side walls.
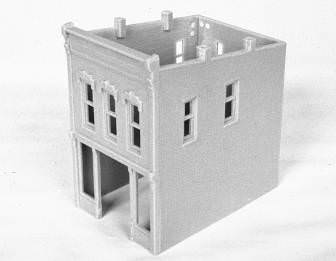
Basic DPM model structure wall assembly.
At this point attach the other half of the chimney pieces, if your kit has part of the chimney molded into the side wall (like the kit in the photo above). Make sure to sand flush the bottom of the chimney pieces before gluing them in place or the roof will not fit properly.
After the wall joints are thoroughly dried, the roof is fitted. Many of these kits have a styrene sheet roof which must be cut to fit. You may wish to cut a test roof from cardboard before cutting the styrene. Some kits will fit the roof in from the bottom against the base of the chimneys (see the photo below); others may provide styrene strips which are to be cut and glued as a shelf for the roof to rest on. Scissors work best to cut and trim the plastic styrene roof material. The roof and supporting strips are assembled with liquid styrene glue.
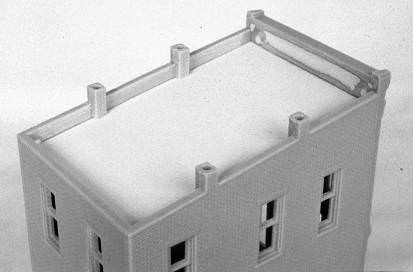
Styrene roof installed in DPM model railroad structure.
One way to improve the appearance of the structure is to add holes to the chimney tops. Three ways include drilling a round hole (which is the hardest method), slicing a section of Plastruct square rod (which has a built-in round hole in the middle) and gluing it on top of the chimney, or attaching a small slice of brass tubing. You’ll need to sand the top of the chimney level before using any of these methods.
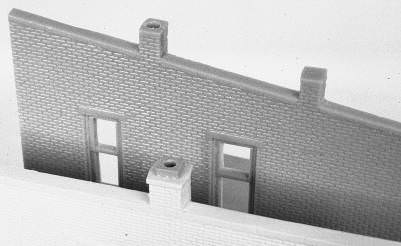
Chimney options for basic DPM model structures.
When the glue sets, rub the base of the entire assembled structure on the sandpaper atop a flat surface to assure that the bottoms of all walls are even. This provides a solid bond with the ground when the building is installed on your layout.
If the kit has recessed doors or windows, trim the casting tabs or excess material and assemble the bay as a unit, carefully checking the fit into the structure before the glue totally sets.
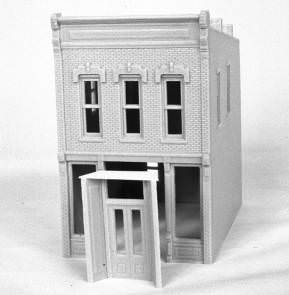
Doorway assembly for DPM model structure.
On this structure, the recessed door has been improved by adding a ceiling at the top of the door bay from a surplus piece of the roof styrene. The styrene is attached flush with the front of the door unit, so it fits inside the building. After the door assembly dries, glue it into the door opening.
If the doors and windows are separate pieces in your kit, don’t glue them in yet. You’ll want to paint the building and windows separately and then glue them together. Our example kit has the doors and windows as part of the walls.
Before painting, wash the entire building using dishwashing detergent to remove sanding residue and finger oils. Rinse with plain water and air-dry thoroughly. This ensures that the paint will bond properly, and will prevent paint blemishes caused by finger and casting oils on the plastic.
Plastic structures are painted with a water-based or latex paint such as Badger’s Model-Flex. These, as well as craft paints, may be brushed or airbrushed on your model. Craft paints are available in colors other than the standard railroad colors which may be more appropriate for buildings.
Paint the inside of your building a dark color to prevent an unnatural glow in lighted buildings or buildings with large windows. You can go back and paint it a lighter color or “wallpaper” the interior if black or dark brown is too visible through the windows. The example building was painted tuscan oxide red, which is a good brick color. This red is dark enough to use to paint the interior as well.
DPM structure painted with basic brick color.
After painting the interior, paint the entire exterior, including the roof, your brick color to ensure the building has an even base color coating. When you look at any structure, you see the paint. The quality and detail of the paint job makes the difference between a toy building and a scale structure.
Brickwork is enhanced by additional attention to detail. Brick masons add texture to brickwork by laying a contrasting or darker color of brick in random or carefully-planned patterns, especially on the front of buildings. This is duplicated by brushing on a contrasting color paint on individual bricks or coloring them with a fine-point art marker, such as a Berol Prismacolor marker. The Berol mahogany red color is a good contrast to the tuscan oxide red base brick color. This “freckle” technique is a good television room project.
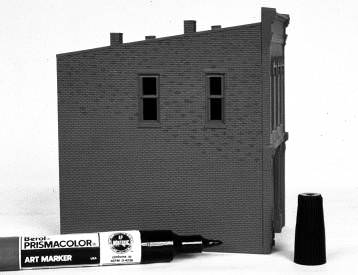
Highlighting bricks on a DPM model structure.
Mortar is an essential detail for brick buildings. It makes the brick detail stand out. Two buildings may have the same color of brick but look very different because they have different mortar colors. Commercial products like Robert’s brick mortar come in a variety of colors. They are applied and then wiped off so that the color remains only in the joints. Art hobby acrylics, such as Ceramcoat by Delta, are available at craft stores. Off-white, sand, light earth and gray colors are all appropriate for mortar. Coloring the mortar makes a big difference even if you choose to keep the original color of the plastic model and not paint the walls. Q-tips help when wiping the mortar from the small “nooks and crannies.”

Mortar methods for a DPM model railroad structure.
After the mortar dries, mask around the windows and paint the smaller areas like window frames or “stone” window sills in contrasting colors. Scotch tape works very well for most masking tasks. Very small brushes may be used to hand paint these details. More expensive kits have the doors, windows and window sills as separate pieces, making them easier to paint and then attach to the structure after the brick have been weathered.
Weathering a model railroad structure.
Add signs representing those that are painted or papered on the structure. Dry-transfer signs, like those from Woodland Scenics, are usually easier to apply than decals. Purchasing and using the burnishing tool for dry-transfers makes them easier to apply as well. The signs are applied before the weathering, as the signs are weathered too.
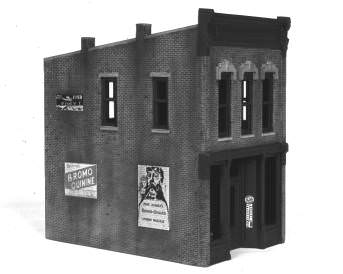
Painted-on signs are added before weathering.
Weathering with colored chalk or copier toner is the quickest method. Apply it vertically, as rain pours down. Sticks of colored art chalks are available in boxed sets of “earth” colors, rub some chalk off the stick with a stiff brush and apply to the building. The chalk or toner needs to be fixed in placed with Dullcoat or cheap lacquer hair spray. A final bit of detail painting on the trim, perhaps in gold or brass, will give a hint as to the era or level of maintenance for that corner store.
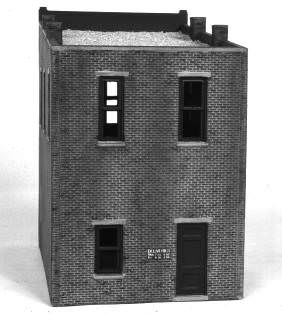
Since we usually are looking down at model structures, pay careful attention to roof finish and details. Flat roofs may be covered with tar paper composed of tissue paper cut in strips or “rolls” and affixed with grimy black paint. Seams or the splash onto the wall may be done with super glossy black paint. Or a roof might be painted black or brown and dusted with a fine talc powder or very fine ballast or sand to replicate a graveled surface. A fine sandpaper, perhaps the same piece used to sand the walls, can be cut and glued down. Detail chimneys, giving thought to where they would logically be in the roof, and drilling out the flues and painting them black. Add trap doors, sky lights, vents, or puddles.
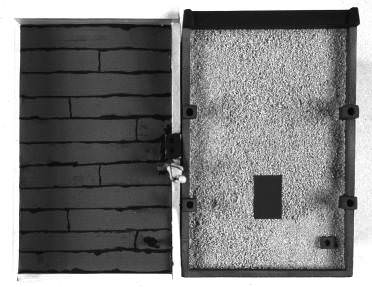
Roof detailing options for model railroad structures.
The building on the left has glossy black tar lines hand painted onto a matte gray roof. Fine ballast was bonded to the roof on the structure at right to simulate a gravel surface.
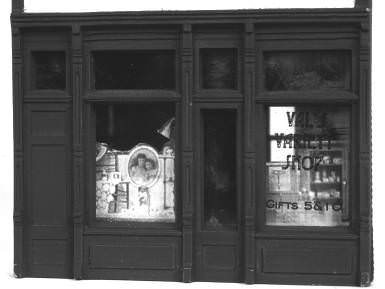
Structures without clear window glazing don’t “look right.” The glazing reflects the surrounding environment, like real glass, and adds other texture to the structure. Notice the difference glazing makes on the example on the right.
Windows detail for model railroad structures.
Install the window glazing after the painting and weathering is complete. Make sure the vapors from the glue you use can escape the structure, or it may fog the glazing material. Some modelers attach their glazing with white (Elmer’s) glue to avoid this problem. Stores with larger windows should have signs or something on the interior so that they do not look vacant. If colored “wallpaper” or small pictures from a magazine or paper curtains or window shades are used, the building will seem to be occupied. Masking tape may be applied to the inside of the second story windows to simulate window shades. The masking tape is self sticking, an appropriate color, and easily applied at various heights. A color or laser printer can print window signs on clear overhead transparency sheets, making custom storefront windows.
Model railroad structure window interior detailing.
Cardstock inserted inside the structure will block light from passing from one side to the other. Use black construction paper, or paint the cardstock black. This prevents the usual unrealistic “see through” effect, as if there were no walls or floors inside the building. The added darkness of the interior will also enhance the reflections in the window glazing, and hide the fact there’s no furniture or equipment inside.

Model railroad structure wall partitions.
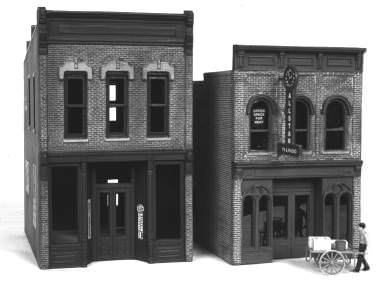
The sign sticking out from the front of this building adds more texture and interest. Walther’s sells an inexpensive set of these signs, including the signs and matching decal lettering. Blair Line and JL Innovative Design also offer plastic and paper structure signs.
Although painting and weathering takes some time, all of the additional detail steps produce a finish drastically improved from an unpainted plastic model or one with just a “one color” paint job. Use your imagination and have fun thinking of ways to set your plastic structure apart from the rest. Signs, people and animals, boxes and barrels, and even more roof detail will further enhance your model. Add furniture and fixtures behind large windows to amaze the viewer.


